 Save
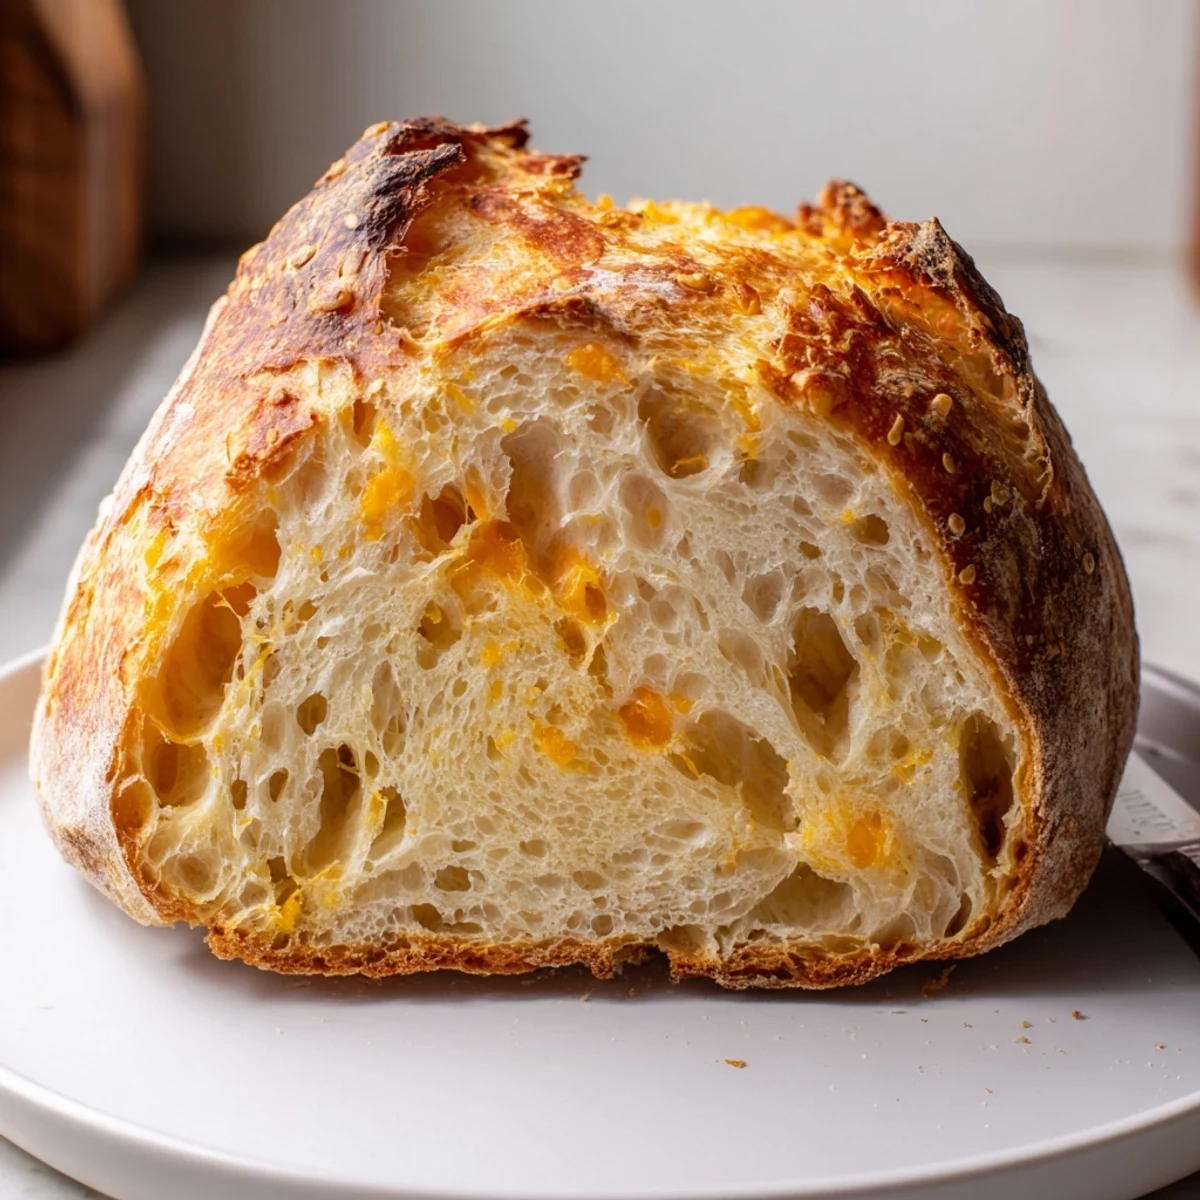
Save This effortless cheddar loaf delivers bakery-quality results with minimal hands-on time. The dough comes together in minutes, requiring only a wooden spoon and bowl. After a simple two-hour rise, bake in a preheated Dutch oven for that signature crispy crust and tender, cheesy interior.
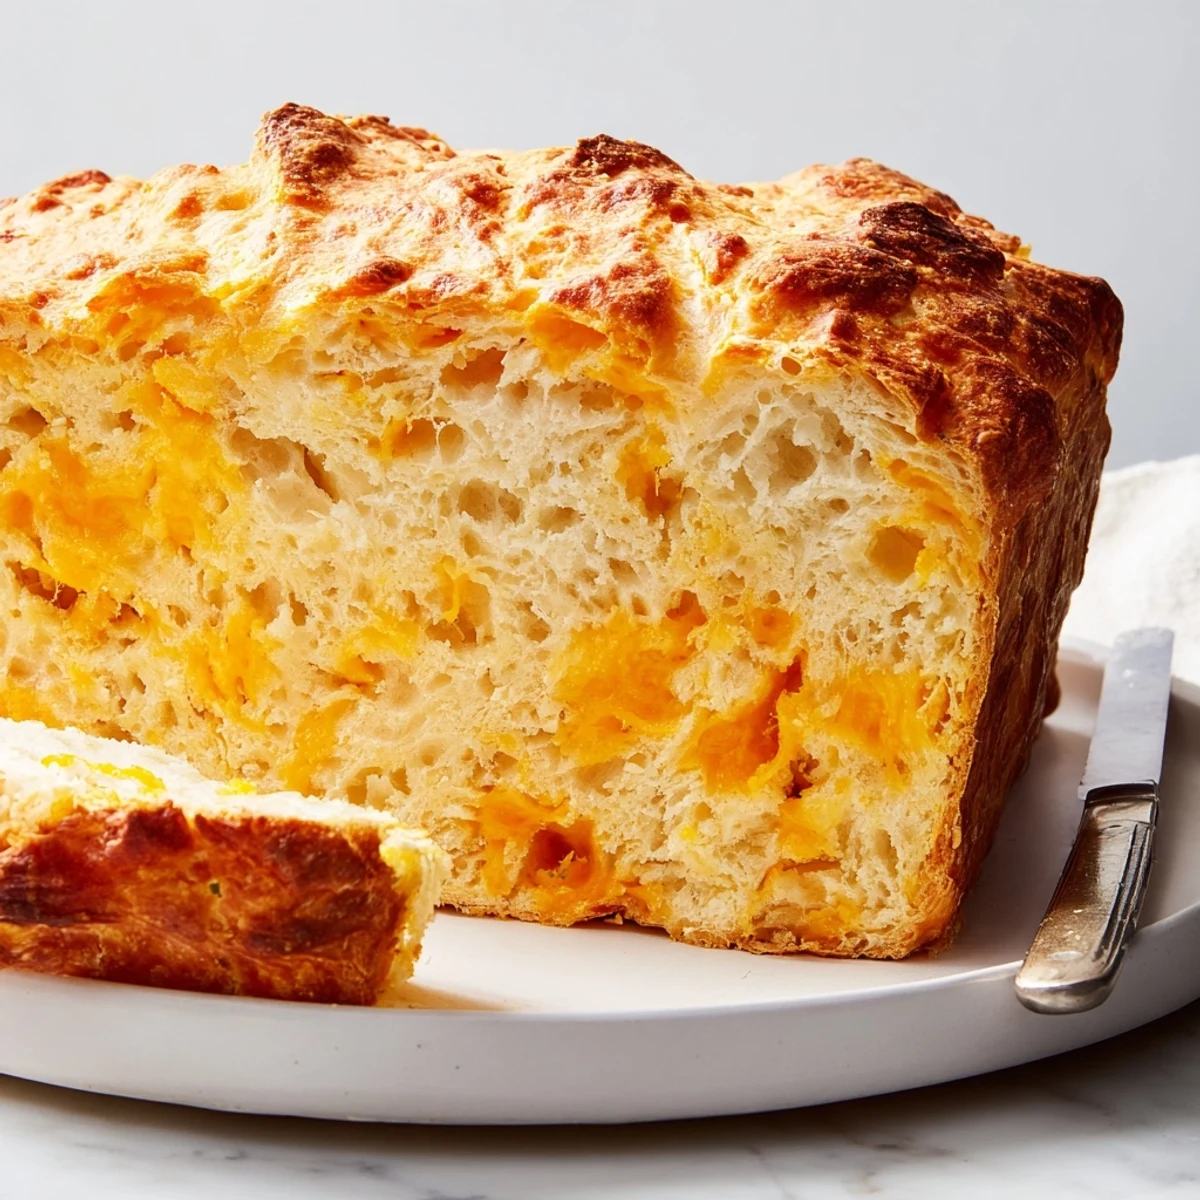
Sharp cheddar creates savory depth throughout each slice, while the high-heat baking method produces a beautifully golden, crackling exterior. The texture is light yet substantial—ideal for toasting, sandwiches, or alongside soups and salads.
Customize easily with Gruyère, pepper jack, garlic powder, or fresh herbs. The straightforward technique makes this perfect for first-time bakers, while the impressive flavor satisfies experienced home cooks.
The smell of cheddar hitting a hot pan has always made my stomach growl, but when I discovered I could bake that same savory magic into bread without any kneading whatsoever, my kitchen routine changed forever. This recipe came together on a gray Sunday afternoon when I wanted something comforting but absolutely refused to spend hours working dough. The first time I pulled that golden, cheese-studded loaf from my Dutch oven, the crust crackled like autumn leaves underfoot, and I knew ordinary sandwich bread had lost its place in my heart.
My sister called me mid-rise once, asking what smelled so incredible. I had to explain that no, I had not started cooking dinner yet, but yes, the entire apartment had filled with the unmistakable aroma of melting cheese and warming flour. When she came over later with nothing but butter knife and appetite in hand, we stood at the counter and devoured half the loaf while it was still too hot to touch properly. Some recipes feed you, but this one feeds everyone within a hundred-yard radius.
Ingredients
- All-purpose flour: The foundation that creates structure while staying tender, bread flour works too but the texture becomes slightly chewier
- Salt: Essential for flavor and helps control yeast activity, making sure those cheese notes really sing
- Instant dry yeast: No proofing needed, it activates directly in the flour mixture and does all the heavy lifting
- Sharp cheddar cheese: The star of the show, grate it yourself from a block for better melting and more intense flavor
- Warm water: Should feel like bath temperature, activating the yeast without killing it or slowing things down
Instructions
- whisk the dry foundation:
- Combine your flour, salt, and yeast in a large bowl until everything looks uniformly incorporated, creating the perfect bed for that cheese to land in
- fold in the cheddar:
- Stir your grated cheese through the dry mixture until each strand is lightly coated in flour, which helps prevent clumping as the dough rises
- bring it together:
- Pour in the warm water and stir with your wooden spoon until a shaggy, sticky dough forms, looking a bit messy but holding its shape when you stop mixing
- let the magic happen:
- Cover your bowl tightly and walk away for two hours, letting time and yeast transform that sticky mess into a puffy, bubbled masterpiece that smells incredible
- heat your vessel:
- Preheat your oven to 450°F with your Dutch oven inside, creating that steam-filled environment that makes bakery style crusts possible at home
- shape with confidence:
- Turn your dough onto a floured surface and gently fold the edges toward the center to form a rough round, working quickly and lightly to preserve all those air bubbles
- the hot transfer:
- Carefully lift your dough into the screaming hot Dutch oven using parchment paper as your sling, protecting your hands from the intense heat
- create the crust:
- Bake covered for 30 minutes, trapping steam around the loaf, then remove the lid and let it go another 10 to 15 minutes until deep golden and gloriously crisp
- the hardest part:
- Cool on a wire rack for at least 20 minutes, giving the crumb time to set so your first slice shows off that perfect texture instead of smashing it
 Save
Save This bread has become my go to when friends need cheering up or when Tuesday night dinner deserves to feel special. There is something so satisfying about pulling a restaurant quality loaf from your own oven, especially when the effort involved was practically nonexistent. The first time I made it for a dinner party, people kept asking where I had bought it.
Choosing Your Cheese
Sharp cheddar brings the most pronounced flavor, but I have experimented with everything from smoky gouda to spicy pepper jack with delicious results. The key is grating it yourself from a block since pre shredded cheese contains anti caking agents that can make your bread strangely gritty. A mix of cheeses creates incredible complexity, like combining sharp cheddar with just a bit of gruyere for that nutty depth.
Timing Your Bake
The two hour rise is fairly forgiving, giving you a nice window to work around your schedule instead of the other way around. I often mix the dough in the morning, let it rise while I run errands, then bake it whenever I am ready for that incredible smell to take over my kitchen. Just do not rush the final cooling time, or you will end up with a gummy crumb that makes all that waiting feel wasted.
Serving Suggestions
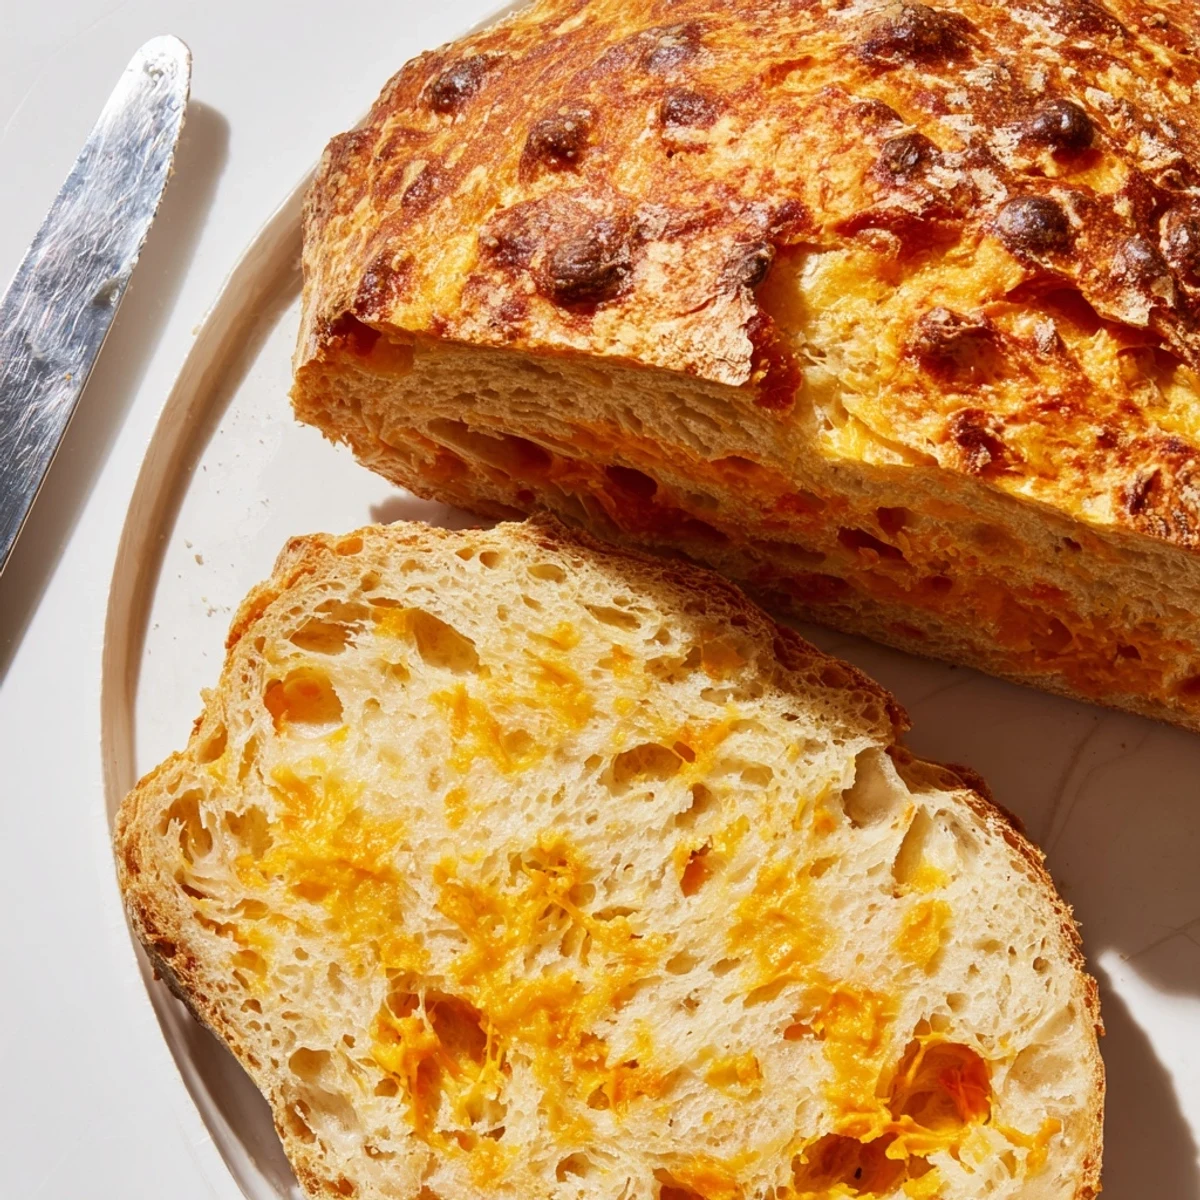
This bread makes the most extraordinary toast imaginable, transforming simple scrambled eggs into something that feels like brunch at a fancy cafe. It also pairs beautifully with tomato soup, holds up beautifully to being dunked in hearty beef chili, and can even stand alone as a cocktail hour snack with nothing but good butter. The texture stays remarkable for a couple days, making it perfect for packing in lunch boxes or grabbing for a quick snack.
- Try spreading it with honey butter for that sweet and salty combination that nobody can resist
- Leftover slices make the most incredible grilled cheese sandwiches your family has ever experienced
- Freeze extra loaves wrapped tightly in plastic and they will taste nearly as good as fresh baked
 Save
Save May your kitchen always smell like warm cheddar and your table always be surrounded by people who reach for just one more slice.
Recipe FAQs
- → Why use a Dutch oven for baking?
-
A Dutch oven creates a steam-filled environment that mimics professional bread ovens. The trapped moisture helps develop a crispy, golden crust while keeping the interior tender and moist. The heavy heat distribution ensures even baking throughout the loaf.
- → Can I substitute the cheddar cheese?
-
Absolutely. Gruyère adds a nutty richness, pepper jack brings gentle heat, and Parmesan contributes salty depth. For something different, try smoked gouda or a blend of Italian cheeses. Keep the total amount around 1½ cups grated for proper dough consistency.
- → How do I know when the bread is done baking?
-
The crust should appear deep golden brown and sound hollow when tapped on the bottom. An instant-read thermometer inserted into the center should read 190-200°F. If the crust browns too quickly, tent loosely with foil during the final minutes.
- → Why is the dough so sticky and shaggy?
-
This hydration level is intentional for no-knead methods. The sticky texture creates the necessary structure during rising without manual kneading. Resist adding extra flour—the high moisture content is what produces those beautiful air pockets and a tender crumb.
- → Can I refrigerate the dough overnight?
-
Yes. After mixing, cover and refrigerate for up to 24 hours. The cold fermentation develops deeper flavor. Let it come to room temperature for 30-60 minutes before shaping and baking. This longer rest often improves the bread's complexity and texture.
- → What's the best way to store leftover bread?
-
Wrap tightly in plastic or store in a sealed bag at room temperature for 2-3 days. For longer storage, slice and freeze in freezer bags—toast individual slices straight from frozen. Avoid refrigerating, as it accelerates staling and dries out the crumb.
